|
|
|
|||||||
|
How to assemble a Super Sled Kite Kit |
|||||||
|
You can make a kite out of things you can find at home. To make a sled kite you will need an A4 sheet of paper or lightweight plastic in similar dimensions. The heavier the material, the more wind the kite will need to get aloft. You'll also need:
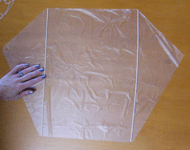
If you haven't got a kite line already wound on to a handle, you'll need to find some lightweight string. You can make a handle by cutting a rectangle of sturdy cardboard, or find a cardboard tube or a plastic bottle - see what you can find in your recycling. Wind your flying line on to the handle. You want 30 - 40 metres of line. This might seem a lot when you're winding it up, but this kite will easily fly that high.- click here for instructions about winding line Lay the A4 piece of paper in front of you in a landscape orientation (sideways). Measure down the side and put a mark 1/3 of the way down. Mark the opposite side in the same place. Measure across the top and mark at the first and third quarters. Mark the bottom in the same places. When you join the marks across the corners, you will end up with a shape like this (it's a hexagon)... |
|||||||
|
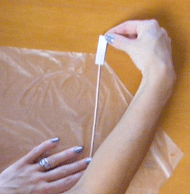
Place the spars on the sail, parallel from corner to corner. |
|
||||||
|
Tape the spars in place:
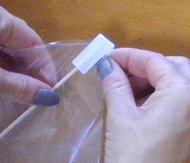
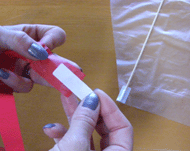
Cut a piece of cellotape about 5 cm long. Put this half over the spar ...
then fold it over to make a pocket.
Do this on all four corners.
Stickers have been used for the photos. If you're using stickers make sure they have permanent and not removable glue. |
|
||||||
|
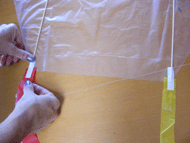
Then place an eyelet at each corner on either side of the kite. If you don't have eyelets, put another piece of cellotape over this corner and carefully make a small hole with scissors. |
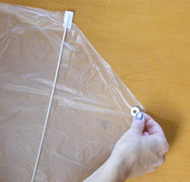 |
||||||
|
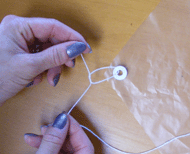
Tying on the Bridle Line: You will need to cut a piece of string which is 2 times the width of the kite and use this for your bridle.
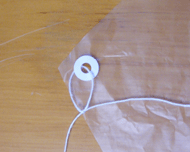
Put the line through the eyelet keeping one end just long enough to tie the knot and the other end will be really long.
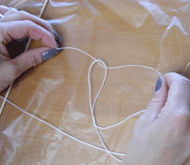
Tie a square knot loosely around the eyelet. To do this put the short end over the long end and through the loop (don't pull this tight yet) ...
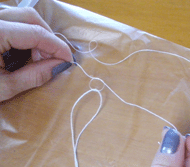
Then again take the short end over the long end and through the loop just created ... Pull the second knot tight against the first knot to form a loop around the eyelet.
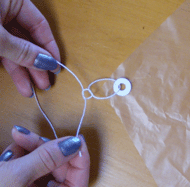
Do the same with the other end of the bridle line through the other eyelet.
You will end up with a big loop of line. |
|
||||||
| Making
the Towing Point:
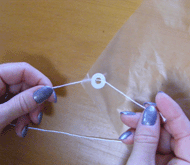
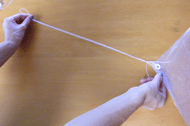
Hold the eyelets together and pull the bridle line out between your thumb and forefinger to get to the exact middle of the bridle line. You might want to mark this centre with a marker pen. Now tie an Overhand Loop Knot which will make a loop for you to tie the flying line to. |
|
||||||
|
and your kite will look like this. The front of the kite is facing you. This is a good time to start decorating your kite. The side with the spars is the front of the kite and will be facing you in flight. See if you can fill up the whole kite sail with big bold patterns that will stand out when the kite is flying high! |
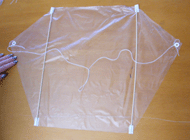 |
||||||
|
Attach the tails to the bottom corners: Cut two more pieces of cellotape 5 cm long. Place half on the end of a tail ...
then press the other half over the tape already holding the spar in place on the front of the kite. Put one tail on each bottom corner. Tails help balance the kite, so it is important that they are on the same place on both sides of the kite. |
|
||||||
|
Tie the flying line to the kite:
Put the line through the loop in the bridle line and tie a square knot. |
|
||||||
|
You'll end up with this - only your's will look more fabulous because you will have decoarated it!
You are ready to go and fly your kite.
|
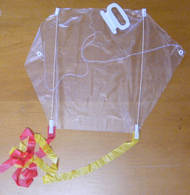 |
||||||
|
You'll find lots of good kite resources on my website at this link - https://kites.co.nz/pages/Schools/resourcekit.htm Check out How
to Fly Your Kite If the weather isn't good for flying your kite, check out my kite quiz and a page to colour in Please don't use this plan commercially. I'm a small business, trying to make a living, and just wanted to give something to those who need a little something for nothing. |
|||||||


